Using Paymentree Pay@Table via the Clover device is fairly straight-forward and is explained in further detail below.
To begin, the Clover device should show the UNIO for Clover screen and will have a TABLEPAY button shown at the bottom of the screen.
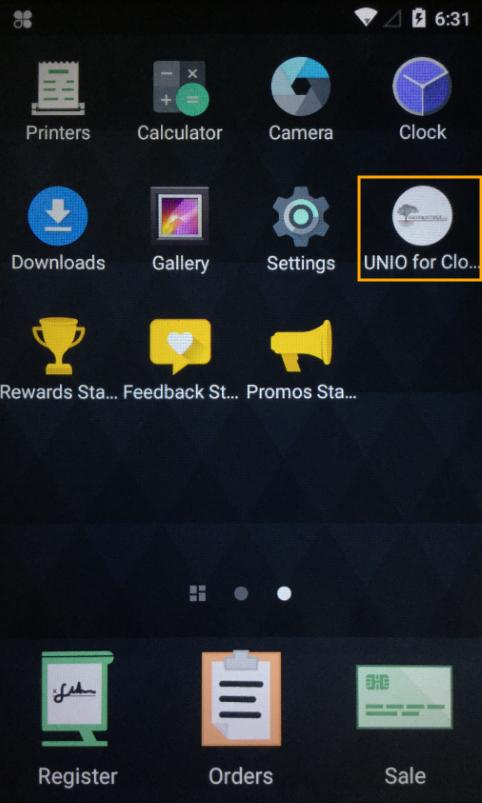
If the UNIO for Clover app is not running, start it by clicking on the UNIO for Clover app icon on the main home screen of the device.
Now that the app is running, the TABLEPAY button should appear at the bottom of the screen as per the below example
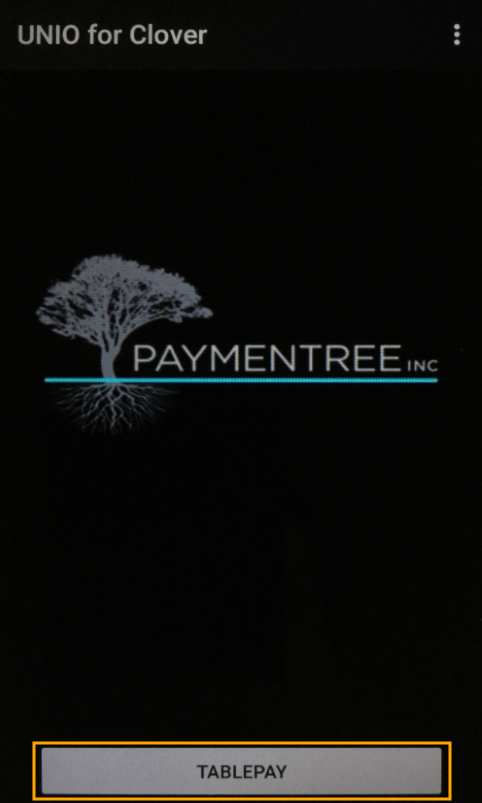
Press the TABLEPAY button.
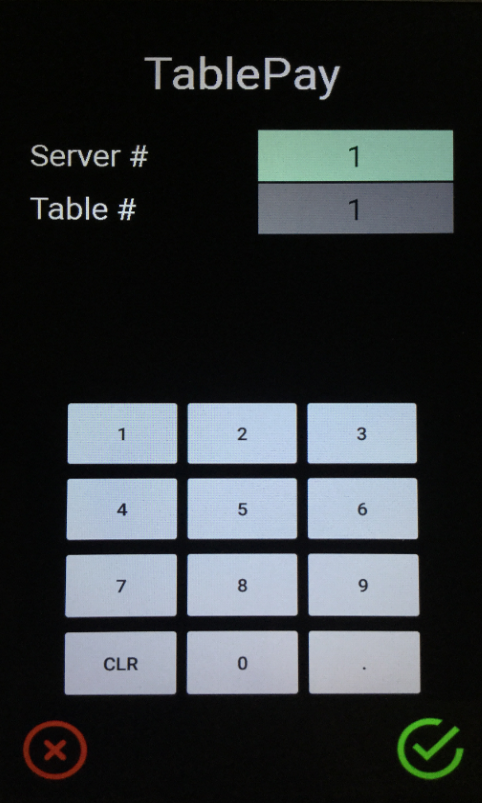
Then enter the Server and Table Number using the on-screen numeric keypad.
The Server Number is also known as the Clerk Number in Idealpos.
Press the green tick button to continue
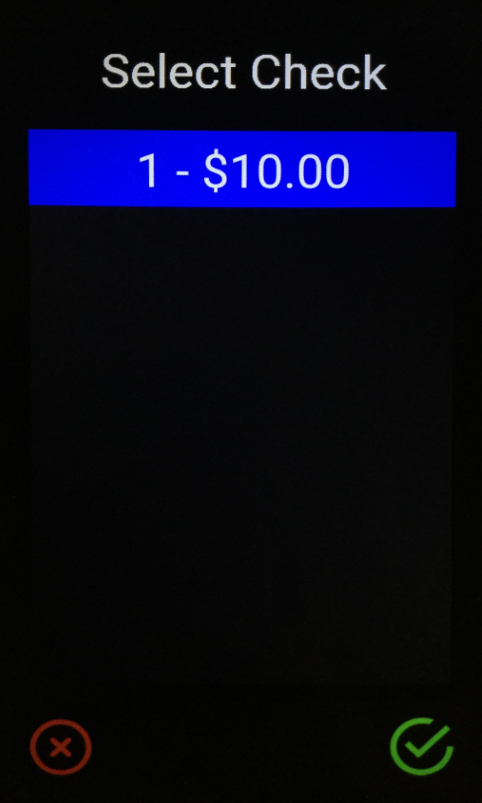
The Clover device will then prompt to Select Check.
Click on the Check from the list which contains the total amount for the table.
After selecting the check, it will be selected with a blue background. Press the green tick button to continue.
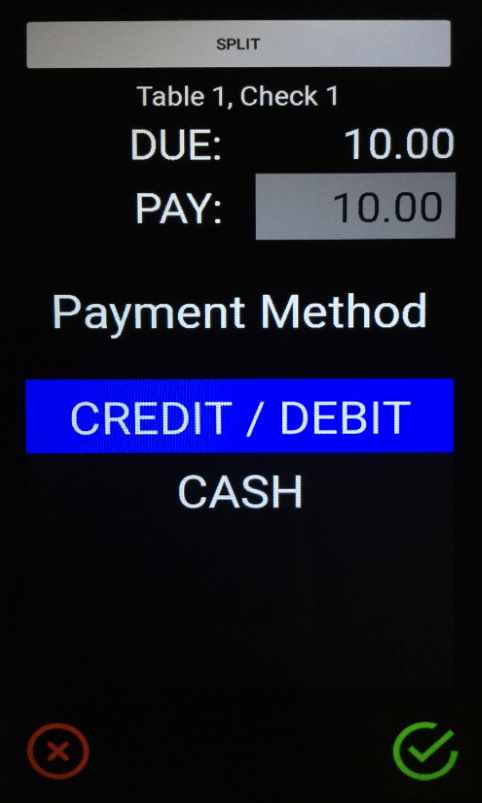
Select the Payment Method "CREDIT/DEBIT"; it will be selected with a blue background, then press the green tick to continue.
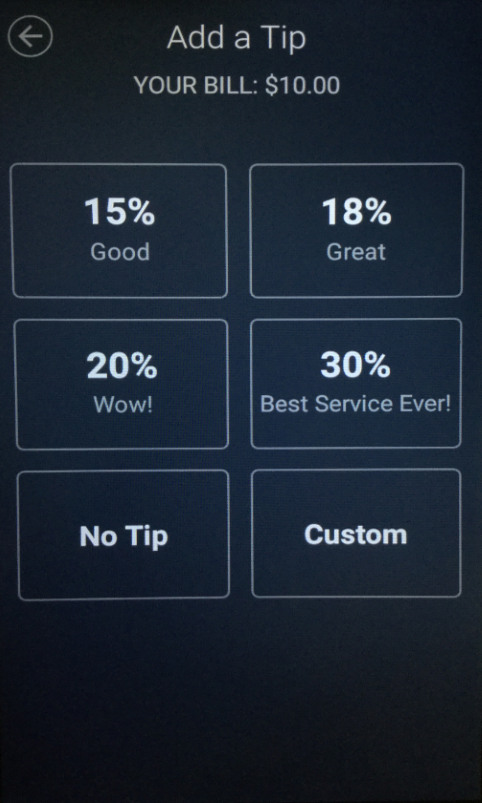
The Clover device will then prompt to Add a Tip.
Select the desired tip amount from the list.
The Clover device will then prompt to either swipe a non-chip card using the magnetic stripe, insert a Card containing a Chip, use NFC to tap a card, or Type Card to manually enter the Card Number.
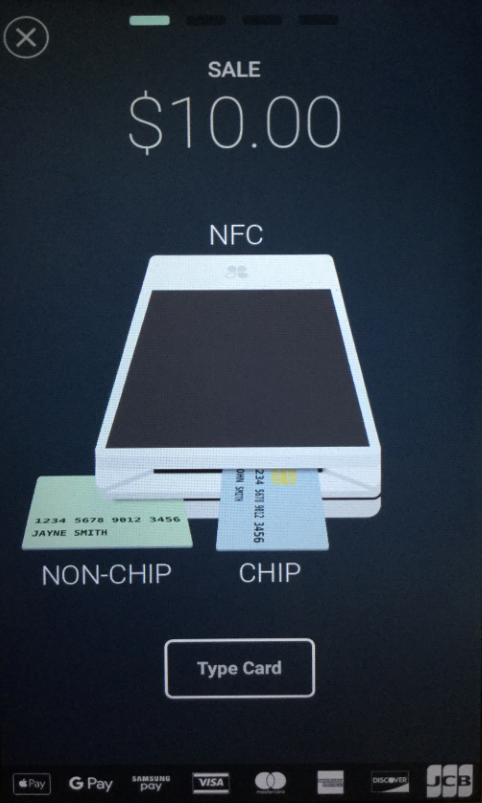
In this example, we inserted a Card with a Chip.
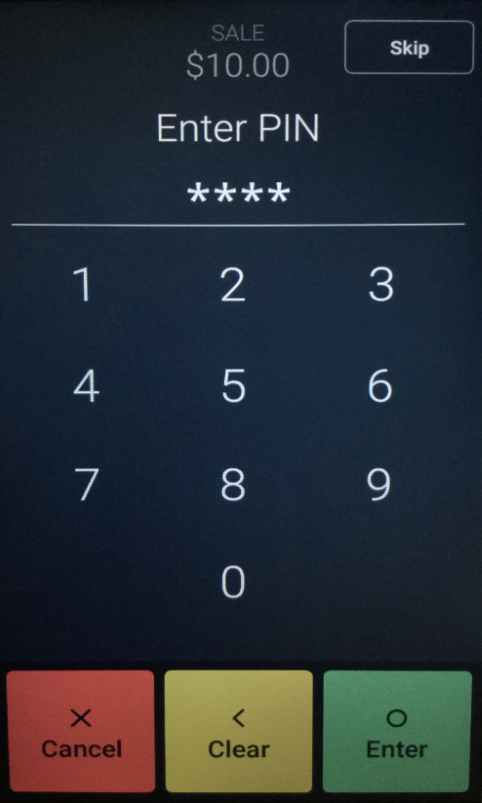
The Clover device will prompt to enter the PIN.
After entering the PIN, press "Enter" to continue.
The device will then process the sale using the card.
If a Card was inserted, the device will prompt to remove the card.

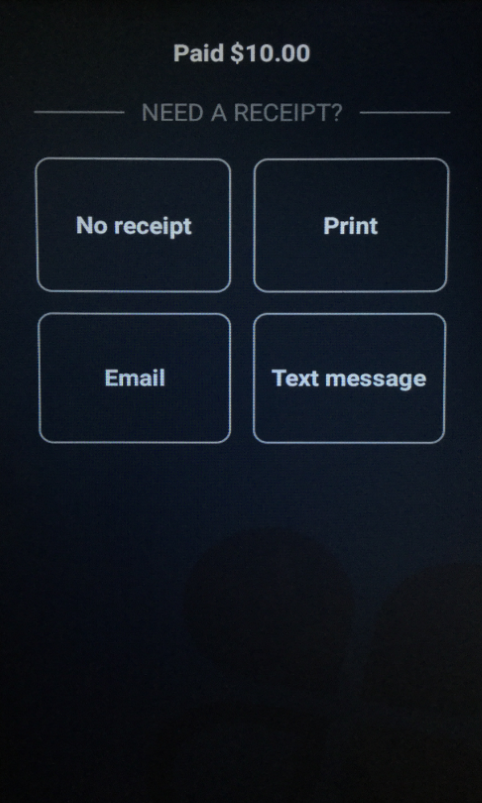
The final prompt will display options for a receipt.
Note that this is for the receipt produced for the actual payment taken from the Clover device.
If selecting the option to Print a receipt, the receipt will be printed by the Clover device containing the amount paid with masked card details, reference number, date, etc.
A sale receipt will also be printed from the POS receipt printer which is configured in Idealpos.
If selecting the No receipt option, the Clover device will not print a receipt for the payment, however, Idealpos will still print the sale receipt.
Should the TABLEPAY button not appear in the app, there may be a connectivity issue between the device and the POSServer.
Ensure that the following points are true:
Should you require more details about the configuration of Paymentree Pay@Table, refer to the topic Configuring Paymentree Pay@Table.